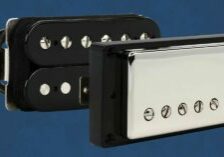
One of the minor issues with a Stratocaster style guitar is that single coils have a 60 cycle hum. Its a small amount of noise that comes from the design. The humbucker pickup was designed to remove that hum, but single coils produce an amazing tone, so you will still find millions of guitars with single coils. You can reduce this hum and other noise from electrical interference by shielding your guitar cavity.
We’ll cover the basics of shielding, the different types of shielding materials, and how to properly install shielding in your guitar. This is not difficult or overly expensive. So while there are many guitarists that don’t bother with shielding, I’ve always found that it helps enough to be worth the effort.
How to Shield Your Guitar’s Electronics for Reduced Noise and Interference: A Step-by-Step Guide
Single coil pickups, such as those found on Fender Stratocasters, are notorious for picking up unwanted electrical noise, hum, and interference from various sources. Shielding the guitar’s control cavity and pickguard is an effective way to reduce this noise, allowing the pickups to deliver a clean, clear tone. When it comes to shielding materials, several options are available, each with their own advantages and disadvantages. This step-by-step guide will show you how to shield your guitar’s electronics for reduced noise and interference.
Step 1: Choose the Right Shielding Material
The first step is to choose the right shielding material. The most common shielding materials are copper foil, aluminum foil, and conductive paint. Copper foil is the most effective, but it is also the most expensive. Aluminum foil is less expensive and still provides good shielding, while conductive paint is the least expensive option but also the least effective.
Step 2: Prepare the Shielding Material
Once you have chosen the shielding material, you need to prepare it for installation. If you are using copper or aluminum foil, you will need to cut it into strips that are slightly larger than the area you are shielding. If you are using conductive paint, you will need to mix it according to the instructions on the package.
Step 3: Install the Shielding Material
Now it’s time to install the shielding material. If you are using copper or aluminum foil, you will need to attach it to the area you are shielding with adhesive. If you are using conductive paint, you will need to apply it to the area with a brush or roller.
Step 4: Test the Shielding
Once the shielding material is installed, you should test it to make sure it is working properly. You can do this by plugging your guitar into an amplifier and playing it at a high volume. If you hear any noise or interference, you may need to adjust the shielding material or add more.
By following these steps, you can shield your guitar’s electronics for reduced noise and interference. Shielding your guitar’s electronics is an important part of maintaining your instrument and ensuring that you get the best sound possible.
The Different Types of Shielding for Your Guitar’s Electronics: Which Is Right for You?
When it comes to shielding your guitar’s electronics, there are several options available. Each type of shielding has its own advantages and disadvantages, so it’s important to understand the differences between them in order to make an informed decision. Here’s a breakdown of the different types of shielding and what they can do for your guitar’s electronics.
Copper Foil Tape
One of the most commonly used materials for shielding guitars is copper foil tape. This thin, adhesive-backed copper tape is applied to the guitar’s cavities and pickguard to create a Faraday cage, which blocks electromagnetic interference. Copper foil tape is easy to work with and relatively inexpensive, making it a popular choice among guitar players. However, it can be difficult to apply evenly.
Conductive Paint
Another popular material for shielding guitars is conductive paint. This type of paint contains metal particles that create a conductive layer, which also creates a Faraday cage. Conductive paint is applied to the cavity of your guitar with a brush or spray can, and it dries to a hard, durable finish. Unlike copper foil tape, conductive paint is easy to apply evenly, but it is much more expensive. You will notice that most newer quality strat style guitars come with conductive pain shielding. A lot of people believe that conductive paint looks nicer, cleaner and less “DIY”
Aluminum Foil
Aluminum foil is also a viable option for shielding guitars. This material is easy to obtain and inexpensive, and it can be cut to fit the guitar’s cavities and pickguard. However, aluminum foil is not as durable as copper foil tape and not as effective. You also cannot solder onto aluminum. It can also be difficult to apply smoothly without creating wrinkles or gaps. You will often see a thin layer of aluminum foil line pickguards. For this type of application, its inexpensive and better than not having any lining on the pickguard.
It’s worth noting that while shielding can help reduce electrical noise, it won’t eliminate it entirely. Other factors, such as the quality of the guitar’s components and the player’s environment, can also affect the amount of noise picked up by the pickups.
Each material has its own advantages and disadvantages, and the best choice depends on the player’s preferences and budget. With proper shielding, guitar players can enjoy a quieter, more focused tone from their single coil pickups. No matter which type of shielding you choose, it’s important to make sure that it’s properly installed in order to get the best results.
How to Install Copper Tape Shielding in Your Guitar’s Electronics: Tips and Tricks
- Here are some tips and tricks to help you install shielding on your guitar.
- Start by removing the pickguard and any other components that may be in the way. Make sure to take note of the wiring and components so that you can easily put them back in place.
- Once the pickguard and other components are removed, you can begin to install the copper tape shielding. Start placing the in the bottom of the cavity. I try to use the biggest pieces I can as that can help with connectivity throughout the entire cavity.
- Next work on cutting pieces around the sides. I like to put about a 1/2 inch piece around the top of the cavity because this ensures that the shielding will get a good connection with any aluminum foil on the bottom of the pickguard.
- I also like to create a single 1/2 inch thin piece pf tape that goes from the top of the cavity near the neck and down to the big cavity towards the tone pots.
- If you have a multimeter, its a good idea to test for resistance touching the shielding in different areas of the cavity.
- Once the shielding material is in place, you can begin to reinstall the pickguard and other components. Make sure to double-check the wiring and components to ensure that everything is in the correct place.
- Finally, you can test the shielding to make sure that it is working properly. Make sure the pickguard seated properly. I like to screw in 3 of the screws to make sure the pickguard is not lifting in areas with clumps of wiring. Plug in your amp and play it at a moderate volume. If you hear any interference or buzzing, then the shielding may need to be adjusted.
Troubleshooting Common Issues with Shielding Your Guitar’s Electronics
It can be difficult to troubleshoot any issues that may arise during the process. Here are some of the most common issues and how to address them.
1. Poor Ground Connection: If your guitar is producing a lot of hum or buzz, it could be due to a poor ground connection. To fix this, make sure that the ground wire is securely connected to the back of the volume or tone pot. If the connection is loose, tighten it with a screwdriver.
2. Poor Shielding: If your guitar is still producing a lot of hum or buzz, it could be due to poor shielding. To fix this, make sure that the shielding material is properly installed and that there are no gaps or holes in the shielding. Again, test resistance with a multimeter. (Even the cheap ones from Harbor Freight work fine for this).
3. Poor Solder Joints: If your guitar is producing a lot of noise, it could be due to poor solder joints, otherwise known as a cold solder. To fix this, make sure that all of the solder joints are clean, shiny and secure. If any of the joints are loose, re-solder them.
4. Poor Wiring: If your guitar is producing a lot of noise, it could be due to poor wiring. To fix this, make sure that all of the wires are properly connected and that there are no loose or frayed wires.
Shielding Your Guitar’s Electronics: What You Need to Know
Guitarists know that the electronics of their instrument are essential to their sound. Shielding your guitar’s electronics is an important step in ensuring that it produces the best possible sound. Shield your guitar’s electronics to reduce noise and interference and keep your sound clean and clear. This is a relatively simple process that can be done with a few basic tools and materials. You don’t need to be a professional luthier to put shielding on a guitar. While some people claim that shielding isn’t necessarily, I have also found that it reduces enough noise to be worth the small cost and effort.


